OK so I'm no movie star yet he he..... but Krista and I did our first live tutorial for the Paper Niche this week..This is for sure a learning experience and we had a lot of fun
Showing posts with label Distressing Reinkers. Show all posts
Showing posts with label Distressing Reinkers. Show all posts
March 25, 2010


January 05, 2010
Happy New Year
WoW it is 2010 already, where did 2009, 2008 and more go
We had a nice and quiet Christmas and New year week, celebrating with family and friends
I got my Maya Road calendar started. It is only the 5th and I already have January finished :lol: I have used Maya Road chipboard and acrylic calendar, Heartwarming Vintage calender cutouts, papers from 7 Gypsies, stamps from 7 gypsies and Tim Holtz, Grungeboard swirl, crackle accents and paint and distressing ink. The snowflakes are from a garland I had on one of my mini Christmas trees.

We had a nice and quiet Christmas and New year week, celebrating with family and friends
I got my Maya Road calendar started. It is only the 5th and I already have January finished :lol: I have used Maya Road chipboard and acrylic calendar, Heartwarming Vintage calender cutouts, papers from 7 Gypsies, stamps from 7 gypsies and Tim Holtz, Grungeboard swirl, crackle accents and paint and distressing ink. The snowflakes are from a garland I had on one of my mini Christmas trees.
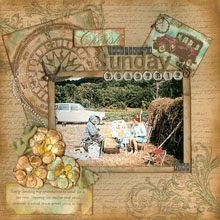
Yes I know... I love the new papers from 7 Gypsies, I also used them here on this LO I made for the January challenge at Scrapbook Express. It is my inspiration using something recycled on the page. The flowers are made out of old bookpages and the title and swirls are cut out of the back of a sketch pad. This is also my January class at The Paper Niche =)


November 29, 2009
Canvas flower tutorial
This flower is really fun and easy to make and the supply list is not to long either =)

What you need is :
A piece of canvas
Tim Holtz distress reinkers
Ranger Crackle Accents
Water(I love my mini mister)
Scissors
A small paintbrush
and your blending tool with a foam pad attached.
Make sure you have a nonporous work space. I use my Ranger craft mat
In the middle of the flower I used Kaiser half pearls. You can use bling or beads or anything else you like to use.
Here is some flowers I made earlier using Broken China and Mustard Seed reinkers
 Have fun making the flowers, they look great on your pages, cards or other projects
What you need is :
A piece of canvas
Tim Holtz distress reinkers
Ranger Crackle Accents
Water(I love my mini mister)
Scissors
A small paintbrush
and your blending tool with a foam pad attached.
Make sure you have a nonporous work space. I use my Ranger craft mat

Cut 3 circles in different sizes out of your canvas. Pick your colors of reinkers. Here I'm using Aged Mahogany and Peeled Paint, With your dropper drip some on to your mat and add water, the more water the lighter the color will be. I like to color the different layers in different shades(of the same color)
Using your blending tool, color the canvas front and back and let dry
When dry paint on a thick layer of Crackle Accent and place on top of each other

Using the handle part of your paint brush, gently push the edges of the circles in toward the center of the flower. You will find that the canvas with Crackle accent is very easy to work with. Squeeze a little extra using your hands. Your flower is now almost done
Remember to get all this done while the Crackle Accents is still wet.
To make leafs, cut leaf shapes out of the canvas fabric.
In the middle of the flower I used Kaiser half pearls. You can use bling or beads or anything else you like to use.
Here is some flowers I made earlier using Broken China and Mustard Seed reinkers
Have fun making the flowers, they look great on your pages, cards or other projects~~~~~~~~~~~~~~~~~~~~~~~~~~~~~~~~~
This week I'm featured on Scrappehuset a great Norwegian challenge blog, Ruffa translated my paperflower tutorial to Norwegian and it was posted there today together with lots of my heritage inspired LO's You can see it right here =)
This week I'm featured on Scrappehuset a great Norwegian challenge blog, Ruffa translated my paperflower tutorial to Norwegian and it was posted there today together with lots of my heritage inspired LO's You can see it right here =)
Subscribe to:
Posts (Atom)